
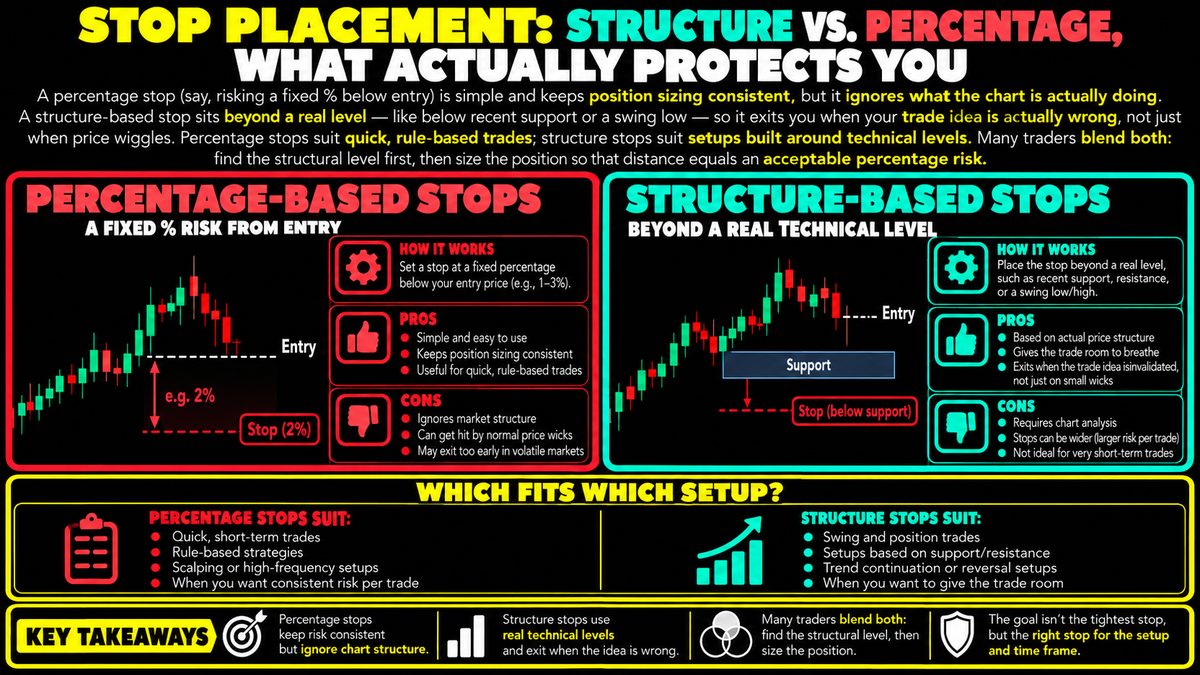
A percentage stop (say, risking a fixed % below entry) is simple and keeps position sizing consistent, but it ignores what the chart is actually doing. A structure-based stop sits beyond a real level — like below recent support or a swing low — so it exits you when your trade idea is actually wrong, not just when price wiggles. Percentage stops suit quick, rule-based trades; structure stops suit setups built around technical levels. Many traders blend both: find the structural level first, then size the position so that distance equals an acceptable percentage risk.
Why Stop Placement Matters
A stop-loss order is an instruction to exit a trade automatically if price moves against you by a certain amount, limiting how much you can lose on that position. Where you place it is arguably more important than where you enter, because it defines your risk before you know the outcome. Two common approaches dominate how traders decide this: the percentage stop and the structure-based stop. Each reflects a different way of thinking about what a stop is actually for.
The Percentage Stop
A percentage stop simply means you exit if price moves a fixed percent against your entry, say two percent or five percent, regardless of what the chart looks like at that point. Its appeal is simplicity and consistency. If you always risk the same percentage per trade, your position sizing becomes mechanical and easy to calculate, which can help control emotional decision-making and keep losses uniform across many trades.
The weakness is that a percentage stop has no relationship to the asset's actual behavior. Imagine a coin trading around 100 that typically swings five percent in a normal day versus another trading around 100 that rarely moves more than one percent. A flat two percent stop treats both the same, even though it might be far too tight for the volatile one and unnecessarily loose for the calmer one. The stop is reacting to an arbitrary number, not to the market's own information.
The Structure Based Stop
A structure-based stop is placed with reference to a real technical level on the chart, such as below a recent swing low, under a support zone, or beyond a trendline. The idea is that the stop should trigger exactly when the technical reason for the trade stops being valid. If a trader buys because price is holding above a support level, the logical invalidation point is a confirmed break below that support, not an arbitrary percentage drop.
This approach ties your exit to the trade's actual thesis. The distance to the stop will vary from trade to trade since it depends on where the nearest meaningful level sits, which means position size has to be calculated after the stop is chosen, not before. Structure stops also are not foolproof. Price can briefly break a level and reverse, a situation sometimes called a stop hunt or a false breakdown, triggering an exit before the original idea actually fails.
Common Mistakes And Limitations
A frequent error is placing a structure stop exactly at the level itself rather than slightly beyond it, which leads to being stopped out by normal noise around that price. Another mistake is using a percentage stop so tight that it ignores the asset's typical volatility, guaranteeing frequent small losses regardless of whether the trade idea was sound. Neither method removes risk entirely, and no stop placement technique can guarantee protection during fast, illiquid, or highly volatile conditions where price can gap past your intended exit.
Blending Both Methods
Many traders combine the two ideas rather than choosing one permanently. The process usually starts with identifying the structural level that would invalidate the trade, then measuring the percentage distance from entry to that level, and finally sizing the position so that distance corresponds to an acceptable percentage of total capital at risk. This keeps the stop meaningful to the chart while still respecting consistent risk management across a portfolio.
Fitting Into A Risk Management Plan
Stop placement is one part of a broader risk framework that also includes position sizing, diversification, and realistic expectations about losing trades. Treat any stop method as a tool for managing uncertainty, not as a guarantee against loss, and remember that past chart patterns or technical levels do not assure future outcomes.